Custom object types#
Custom object types allow you to create your own object types in i-doit -- for all objects that cannot be assigned to the existing standard object types.
Accessing the configuration#
You create and edit custom object types under Administration → CMDB settings → Object type configuration → [Object type group].
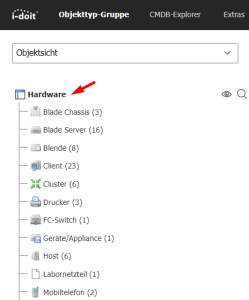
Alternatively, click on the name of the object type group in the tree menu on the left side above the object type list. This takes you directly to the listing of object types in this group, where you can edit them.
In the list view of the object type configuration, click the New button to create a custom object type.
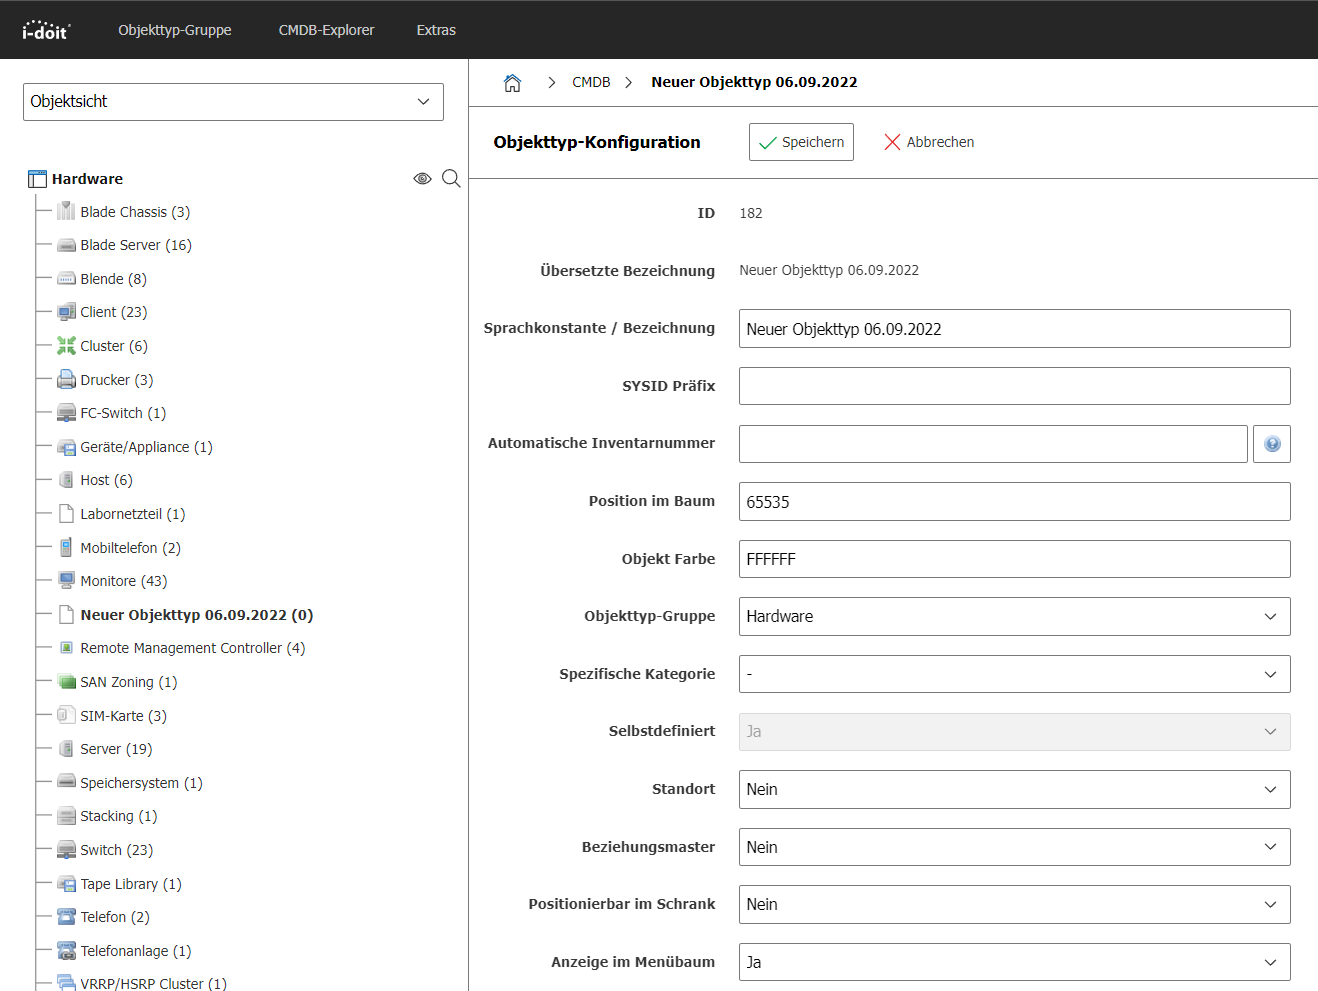
Then configure your object type.
Fields in the configuration#
The following fields are displayed in the configuration of new and existing object types:
-
ID The ID is a sequential number assigned by the system. It is unique and allows identification of the object type. Manual changes are not possible.
-
Translated name Here you can check whether the language constant you are using is correctly translated in the currently selected language, in case you are using a custom language file.
-
Language constant / Name In this field you can assign a language constant or a plain-text name. If you use i-doit multilingually, please use a constant that you translate in your own language files.
-
SYSID prefix The SYSID prefix is used when generating the SYSID for all objects of this type. If you leave this field empty, the default prefix SYSID_ is used. Otherwise, the SYSIDs are generated with your custom prefix. If the field remains untouched, the current Unix timestamp is included in the SYSID when creating an object. With a custom prefix, the object ID is used instead.
-
Automatic inventory number If you want i-doit to automatically generate individual inventory numbers for objects of this type, you can define the schema here. Placeholders are available, which you can display by clicking the blue question mark at the end of the line. It is possible to combine these placeholders with each other and with free text.
-
Position in tree If you do not use alphabetical sorting for the object types in the tree menu on the left side, you can create a custom order using this sorting. Sorting is based on numeric values in ascending order.
-
Object color Here you can assign a unique color to each object type. These color markings can be found, for example, in the CMDB Explorer and in the graphical representation of racks, making it easier for you to maintain an overview.
-
Object type group If you change your mind during configuration and want to assign your object type to a different group, or want to move existing object types to another group, you can adjust the object type group via this setting.
-
Specific category In a drop-down menu, you can optionally select the desired specific category and link it with the object type. Please note that specific categories are mutually exclusive, so only a maximum of one specific category can be selected.
-
Custom The custom information tells you whether the object type was already included in the standard installation or was created by a user. default object types cannot be deleted, only hidden.
-
Location In this selection, you can define whether objects of this type should serve as a physical location for other objects. Objects that are not intended to serve as a physical location will not appear in the location browser.
-
Relationship master Every object relationship has a direction or dependency. When you edit an object and link another object, the linked object is always dependent on the object currently being edited. However, if the linked object is an object whose object type is configured as relationship master, the object automatically assumes the master role in the relationship.
-
Positionable in rack Here you can determine whether objects of this type should be installed within rack units in a rack. When deactivated, the attributes for rack positioning are not available.
-
Display in menu tree The display in the menu tree can be deactivated via this option. If you either do not need standard object types and want to hide them, or do not want your custom object type to appear in the menu tree yet, you can deactivate the visibility for all users here.
-
Image Here you can select a default object image for the information bar.
-
Icon You can set the icon displayed next to your object type in the menu tree in this selection. Specify the path starting from the i-doit installation directory where the icon can be found.
-
Constant You can define a constant through which database queries on the object type are possible. The default schema in i-doit is C__OBJTYPE__[NAME], where [NAME] is to be replaced by the name of the object type. i-doit automatically generates a constant that contains the current Unix timestamp instead of the name. For better readability (in SQL reports, etc.), replace the Unix timestamp with the stylized name of the object type (ideally using only ASCII uppercase letters).
-
Default template If you have already created templates using the template function, you can select a template here that will be used to automatically populate new objects. This way you can pre-fill values that are the same for all objects of this type. These pre-filled values can be adjusted at any time if necessary.
-
Overview page as default view With this selection, you determine whether the overview page or only the General category is displayed when opening an object of this type. By default, this option is set to "No". When set to "Yes", the previously selected specific category is automatically added to the overview page.
-
Categories In this selection, you define your object type. Each category whose checkbox you activate will be available within your object type. In the right column, you determine which categories are displayed on the overview page. This selection is only possible if the overview page was previously activated as the default view. The order of categories can be determined by drag-and-drop using the hatched bars.
-
Description Here you can add notes and comments about your object type.
Once your configuration is complete, you can use the Save button to save your settings. Your custom object type is now available within the selected object type group.