Mass Change#
Mass change is a function in i-doit that allows multiple objects to be changed in one step based on change templates. During this change, the selected objects adopt the attributes of the change template.
Accessing#
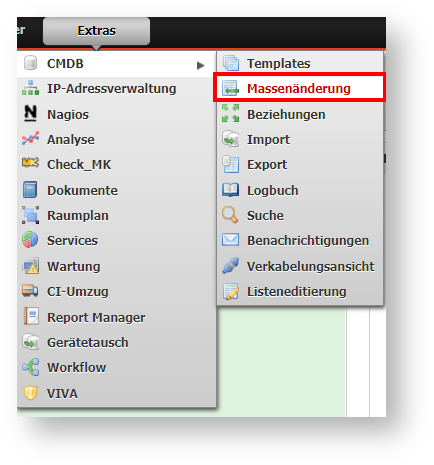
You can find mass change under Extras → CMDB → Mass Change. Here you can view and edit existing change templates, create new change templates, and adjust objects according to the templates.
Creating a Change Template#
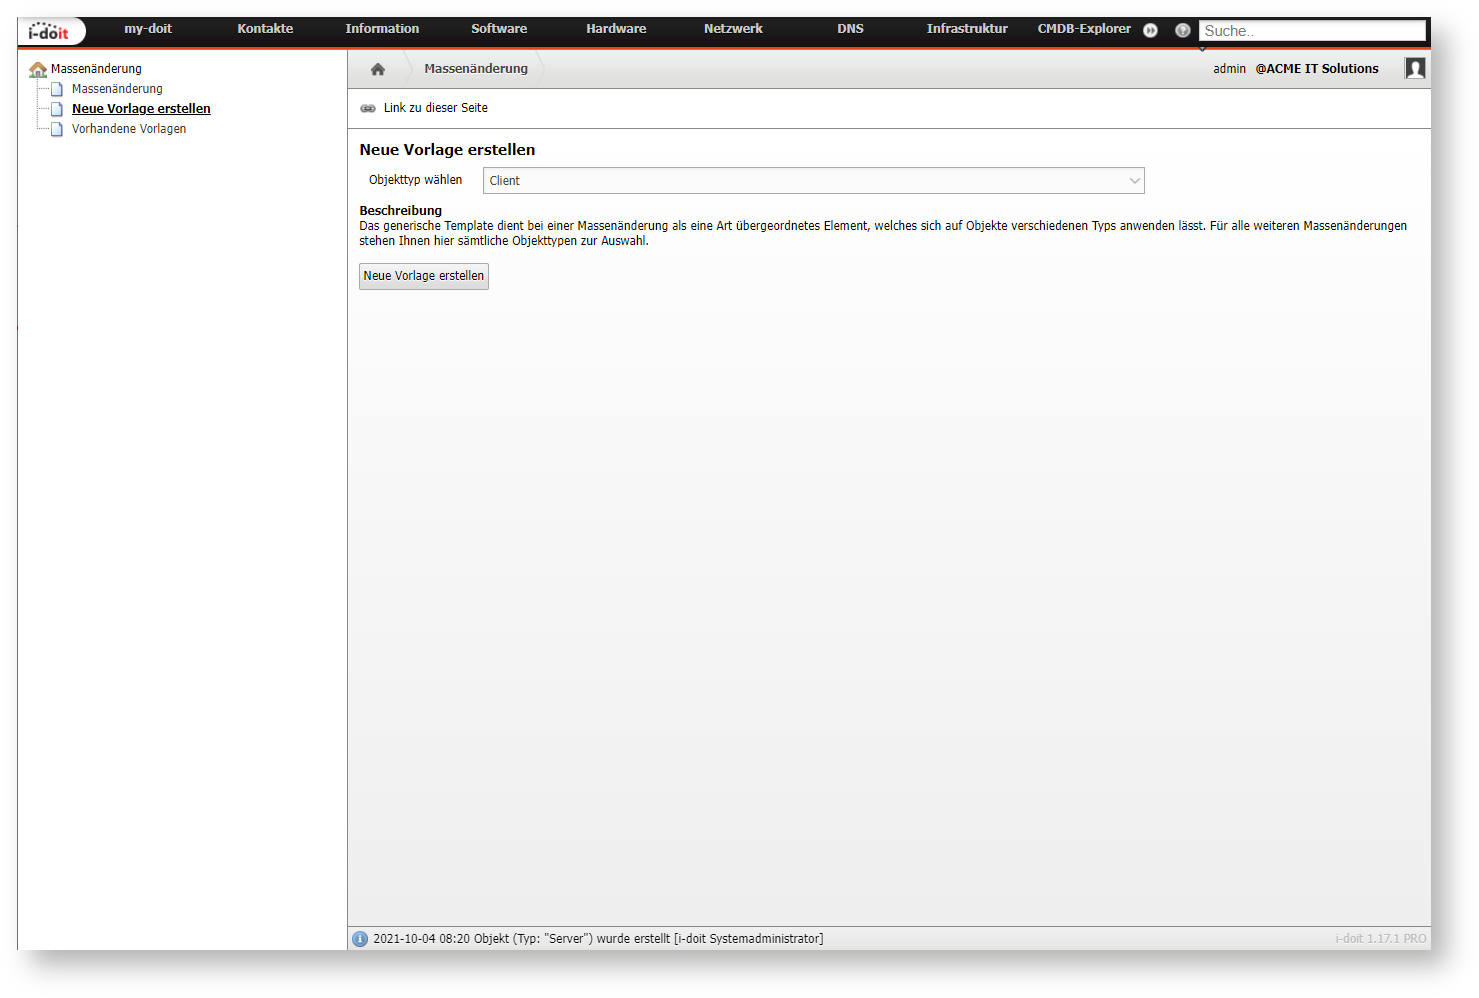
Once you have accessed mass change, you can create a change template under Create new template in the tree menu on the left side. In the first step, you will be asked to specify which object type the template should belong to. Select it from the drop-down menu and confirm with the Create new template button. The subsequent configuration of a template is identical to creating a regular object. Enter all content that you want to transfer to the objects later and save your entries.
Note
You can also specify the Generic Template as the object type for your change templates. This allows you to apply the template to any object type. However, if this template contains content in categories that are not assigned to the objects being changed, you will only be able to view this content in the objects if you assign the corresponding categories.
Viewing, Editing, and Deleting Existing Change Templates#
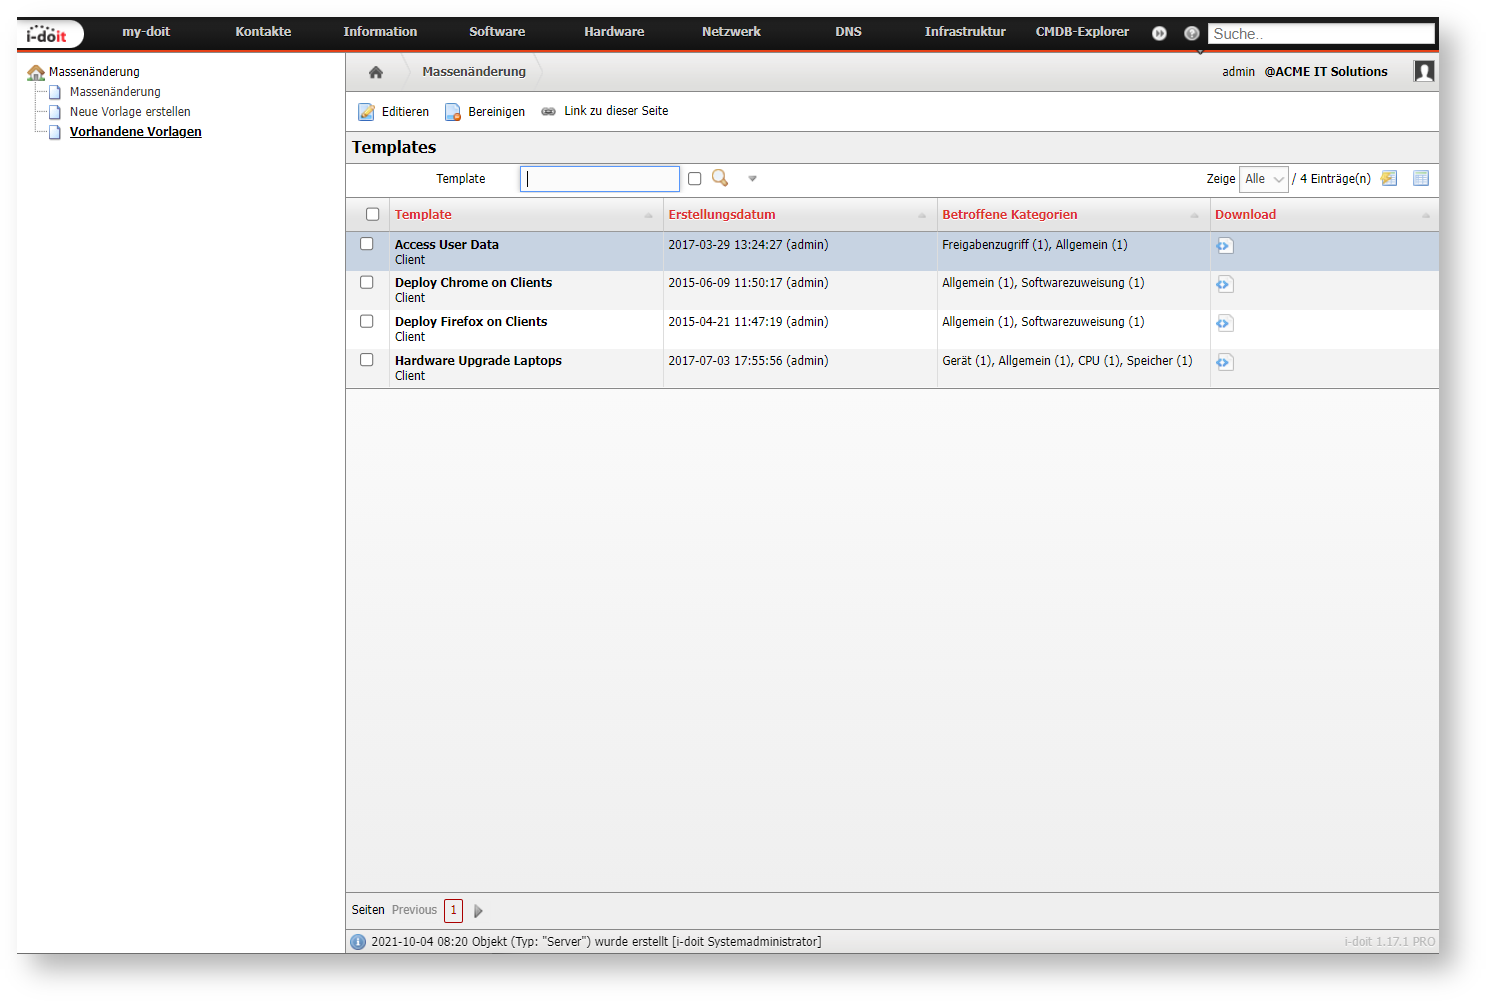
In mass change, you can view all previously created change templates under Existing templates in the tree menu on the left side. To edit a change template, click on it. If you check the checkbox of one or more change templates, you can remove the selected change templates from the system using the Purge button. Please make sure you want to delete the selected change templates, as deleted change templates cannot be restored.
Changing Object Information with a Change Template#
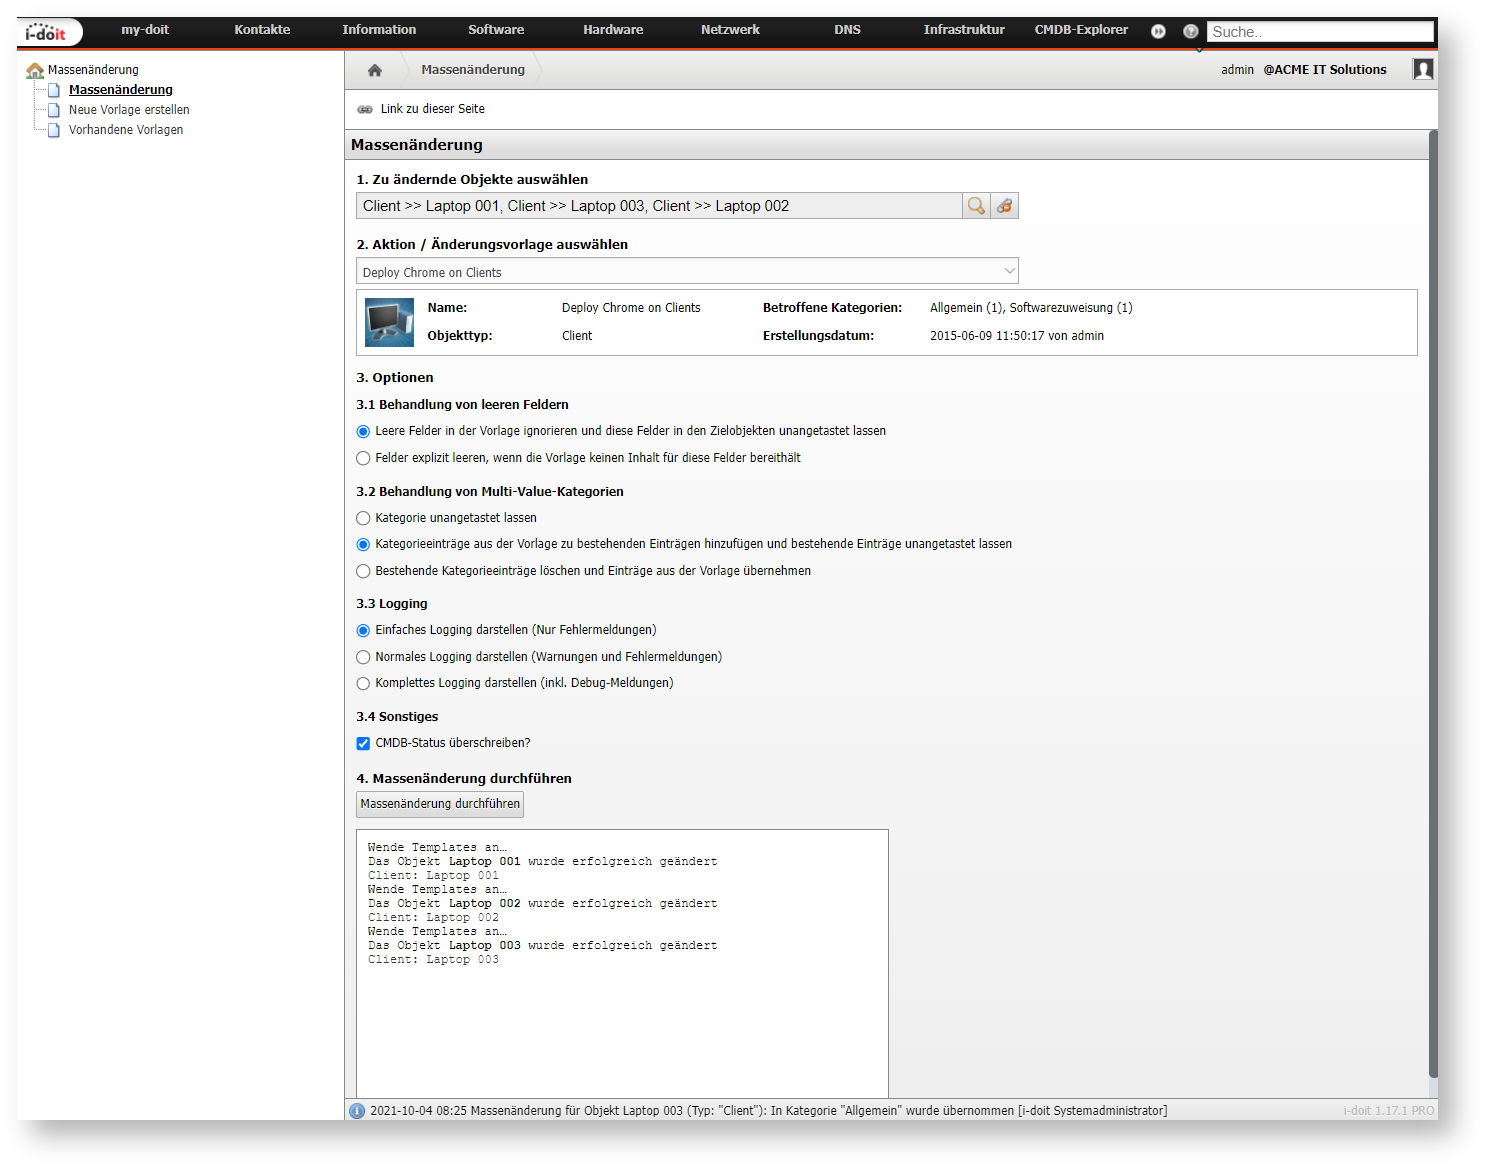
In mass change, use the Mass change item in the tree menu on the left side to edit objects based on your change templates.
Here, in the first step, select the objects you want to adjust. You can select any number of objects. In the next step, you can select the corresponding change template from the drop-down menu on the basis of which the objects should be adjusted.
The options in the third step determine how empty fields in the template and multi-value categories should be handled. For empty fields in the template, two options are available:
- Ignore empty fields in the template and leave these fields in the target objects untouched
- Explicitly clear fields if the template has no content for these fields
This allows you to configure whether your objects should be exactly aligned to the change template or whether only values documented in the change template should be transferred to your existing objects.
Multi-value categories can be handled in three ways:
- Leave category untouched
- Add category entries from the template to existing entries and leave existing entries untouched
- Delete existing category entries and adopt entries from the template
If you leave the categories untouched, no content will be transferred to multi-value categories under any circumstances -- regardless of whether they already contain content or not. The option to add category entries leaves your already documented content intact and adds all entries from your template. When deleting existing entries, all previously existing multi-value entries are deleted and replaced with the content of the change template.
Once all settings meet your requirements, you can transfer the changes to the objects using the Perform mass change button.