Rack View#
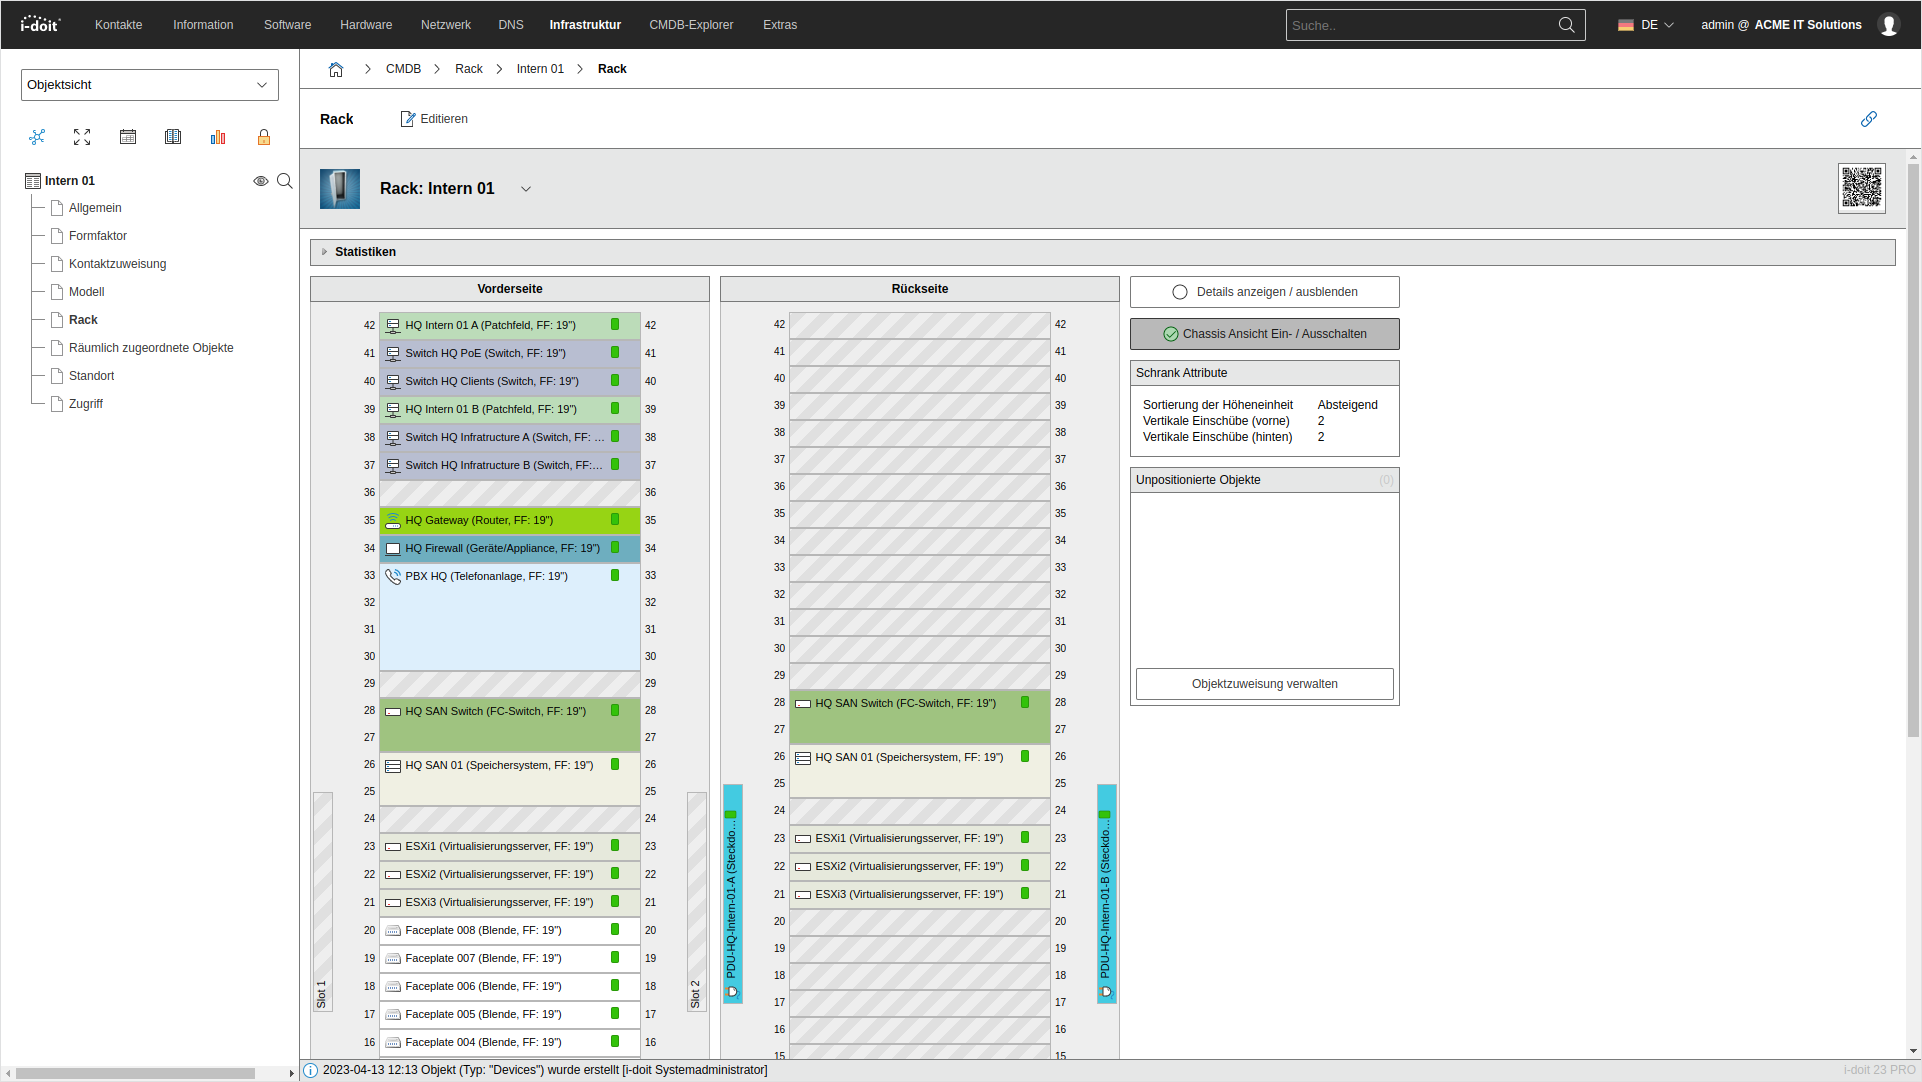
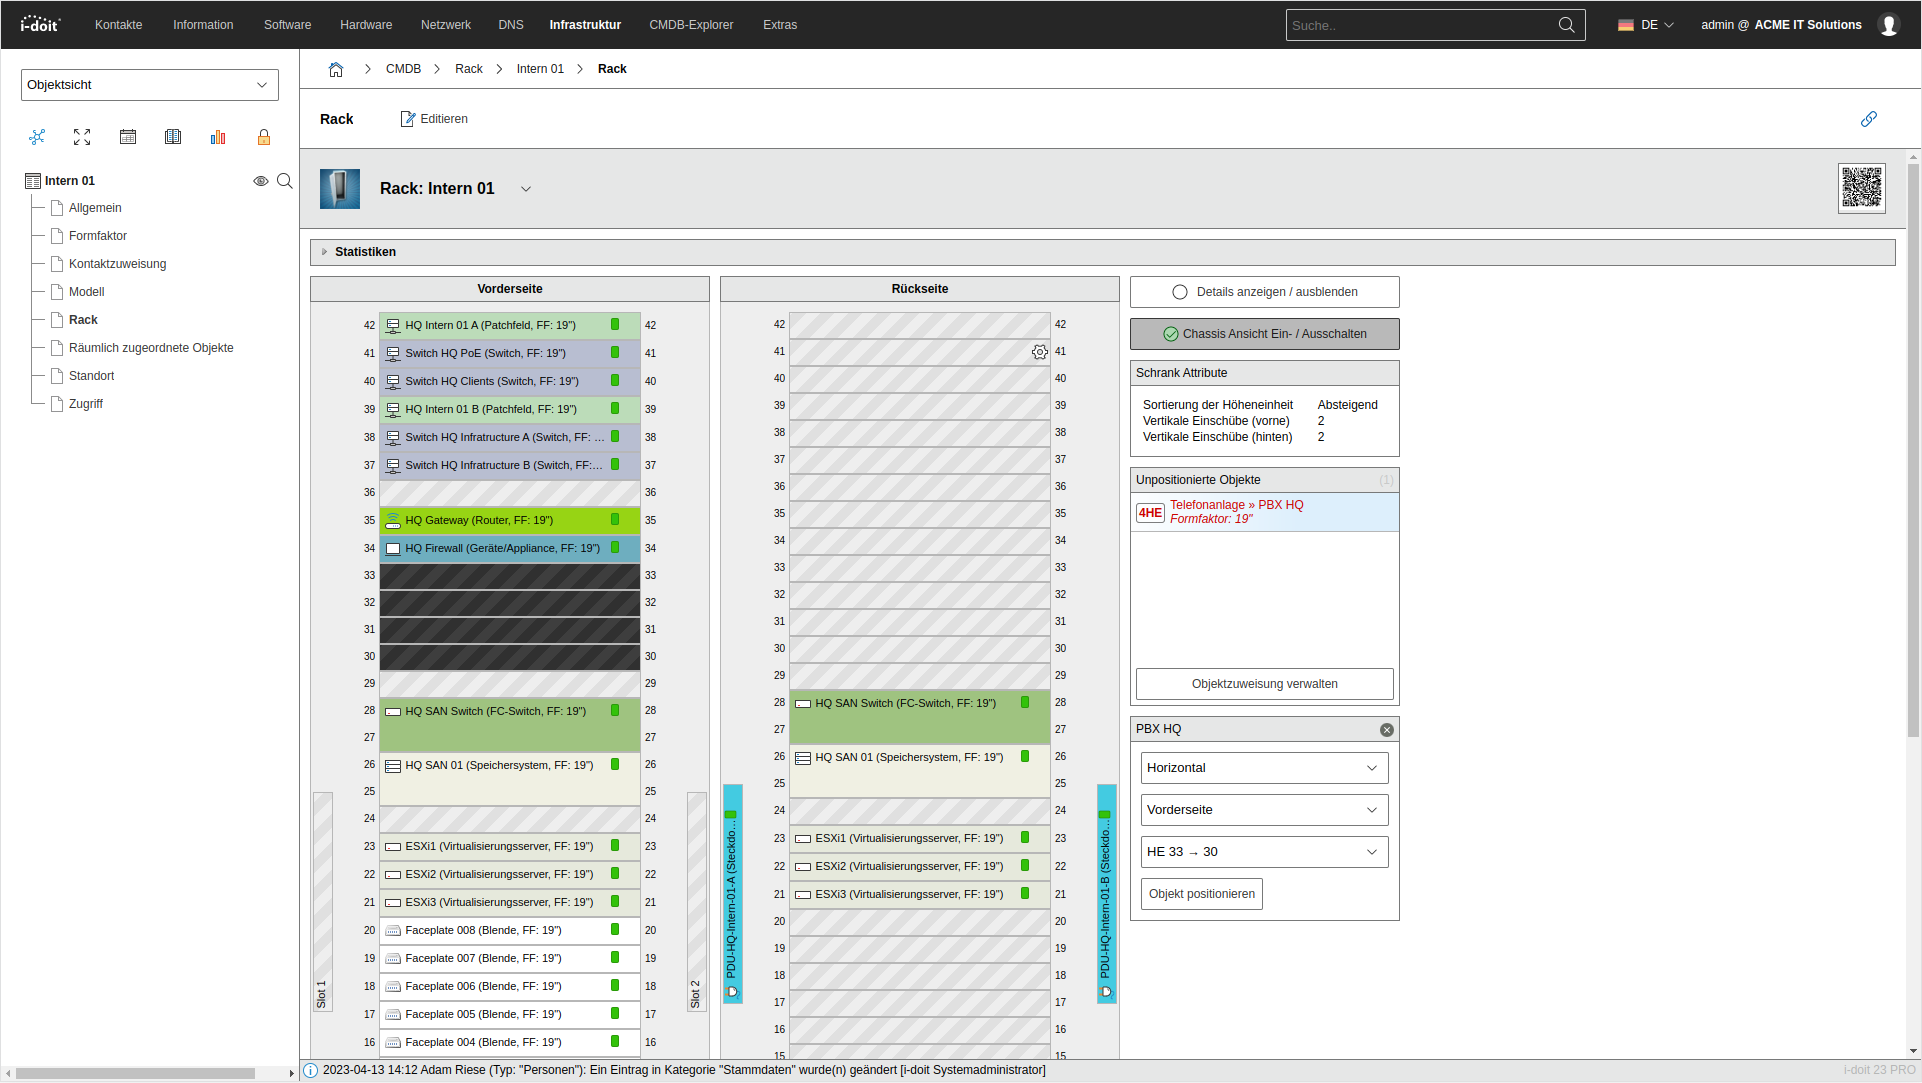
i-doit includes a visualization for 19" racks. All installed components are displayed clearly. Statistics on free rack units, maximum power consumption, and free network ports in switches and patch panels support capacity planning.
Rack Category#
The category Rack is already assigned to the object type Rack in the standard installation of i-doit. The category shows the modeled rack from the front and back.
Schrank = Rack
The screenshots show a demo installation of i-doit in which the original object type Schrank (cabinet) and the category of the same name were renamed to Rack. Anyone who wants to bring their own vocabulary into the IT documentation can do so without any problems.
Editing Rack Attributes#
The rack units of the rack are defined in the Form Factor category. This category is also already assigned to the Rack object type when i-doit is installed. In the category, in addition to the Rack Units attribute, the Form Factor of 19" should also be specified.
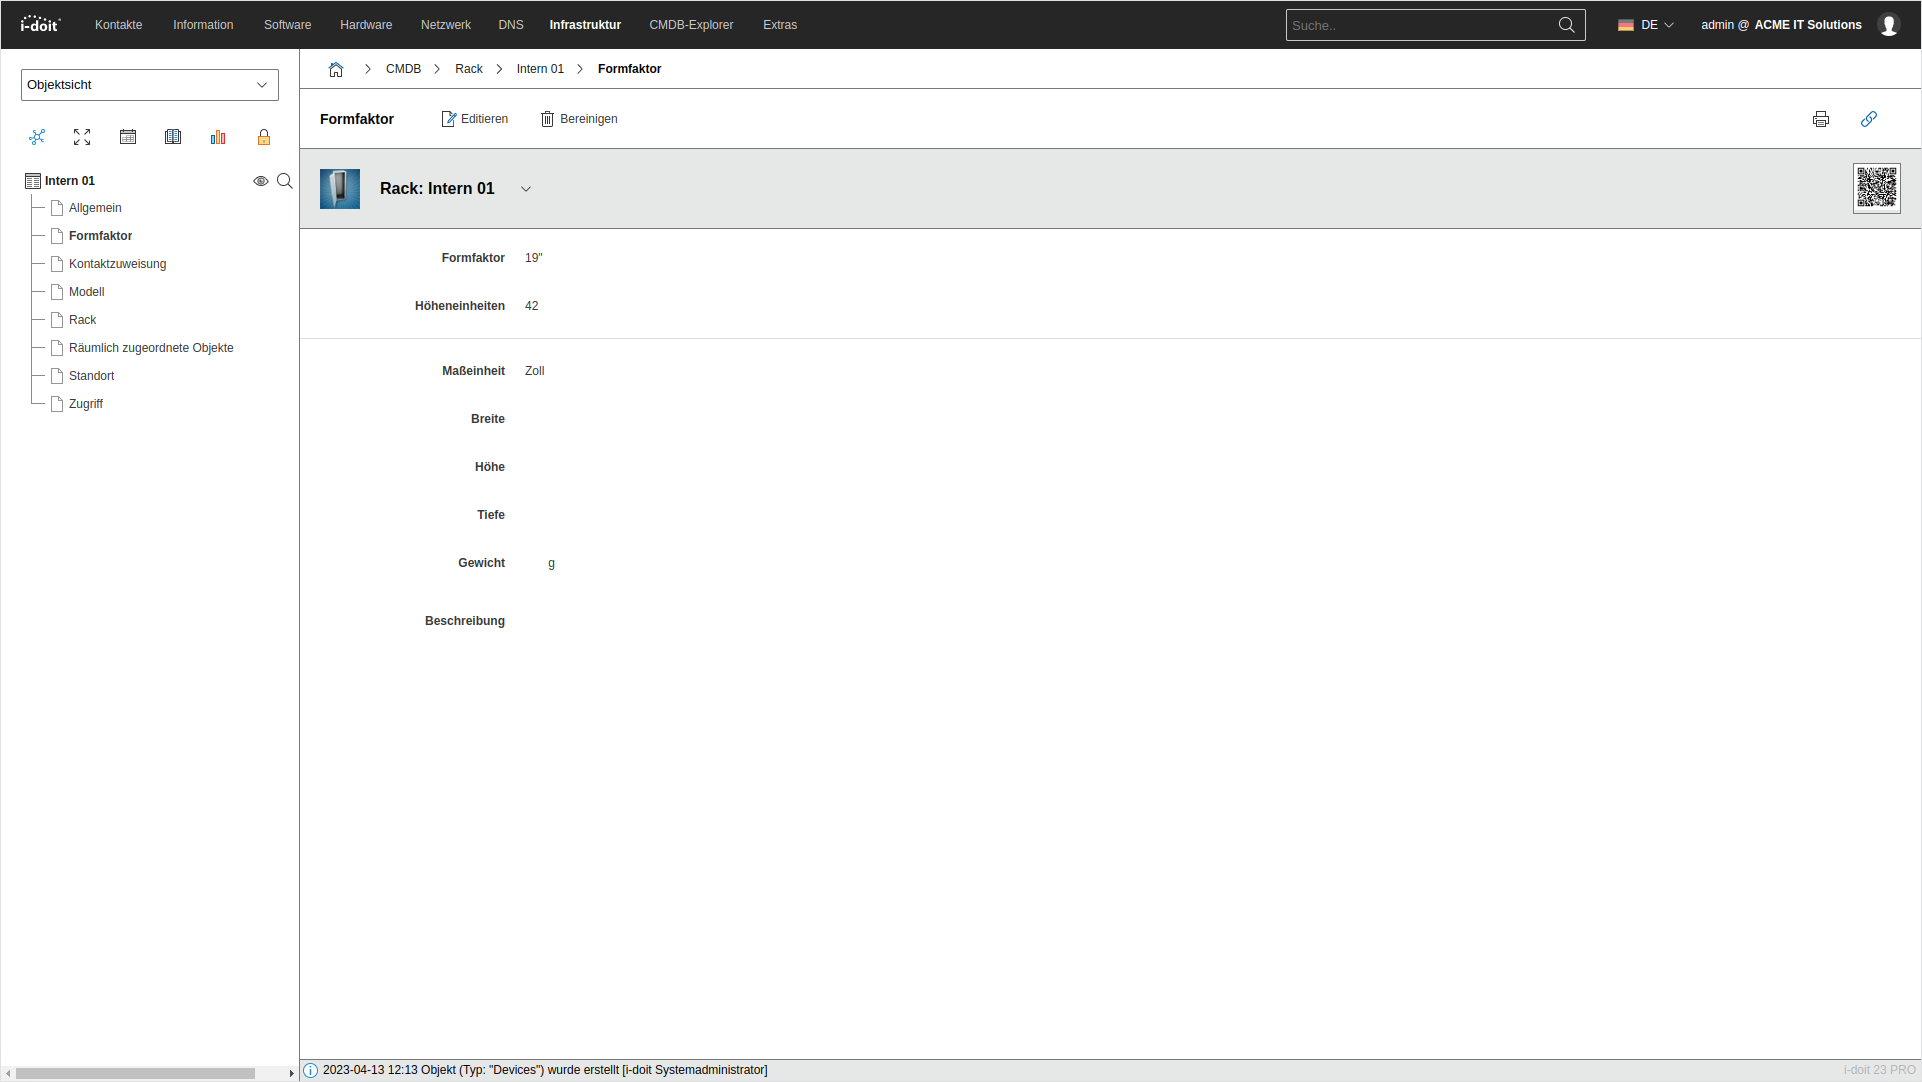
In the example, the rack accommodates 19" components in a maximum of 42 rack units.
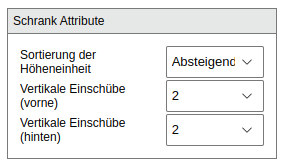
The ascending or descending sorting of rack units is also configured in the Rack category. Switch to edit mode via the Edit button. In the box on the right side, you will find the corresponding drop-down menu.
In this box, you can also specify how many vertical slots are available for front and back. For example, PDUs mounted on the side are documented this way. In the screenshot, 2 vertical slots each are shown for front and back, which are alternately placed on the left and right.
Positioning Objects in the Rack#
To populate racks with objects, two prerequisites apply: First, each object must specify in its Form Factor category how many rack units it occupies, and additionally the Form Factor of 19" should be specified. Second, in the object type configuration, the checkbox must be set indicating that objects of this type are positionable in the rack. If the entry in the Form Factor category is missing, i-doit assumes it is a 19" component with 1 RU.
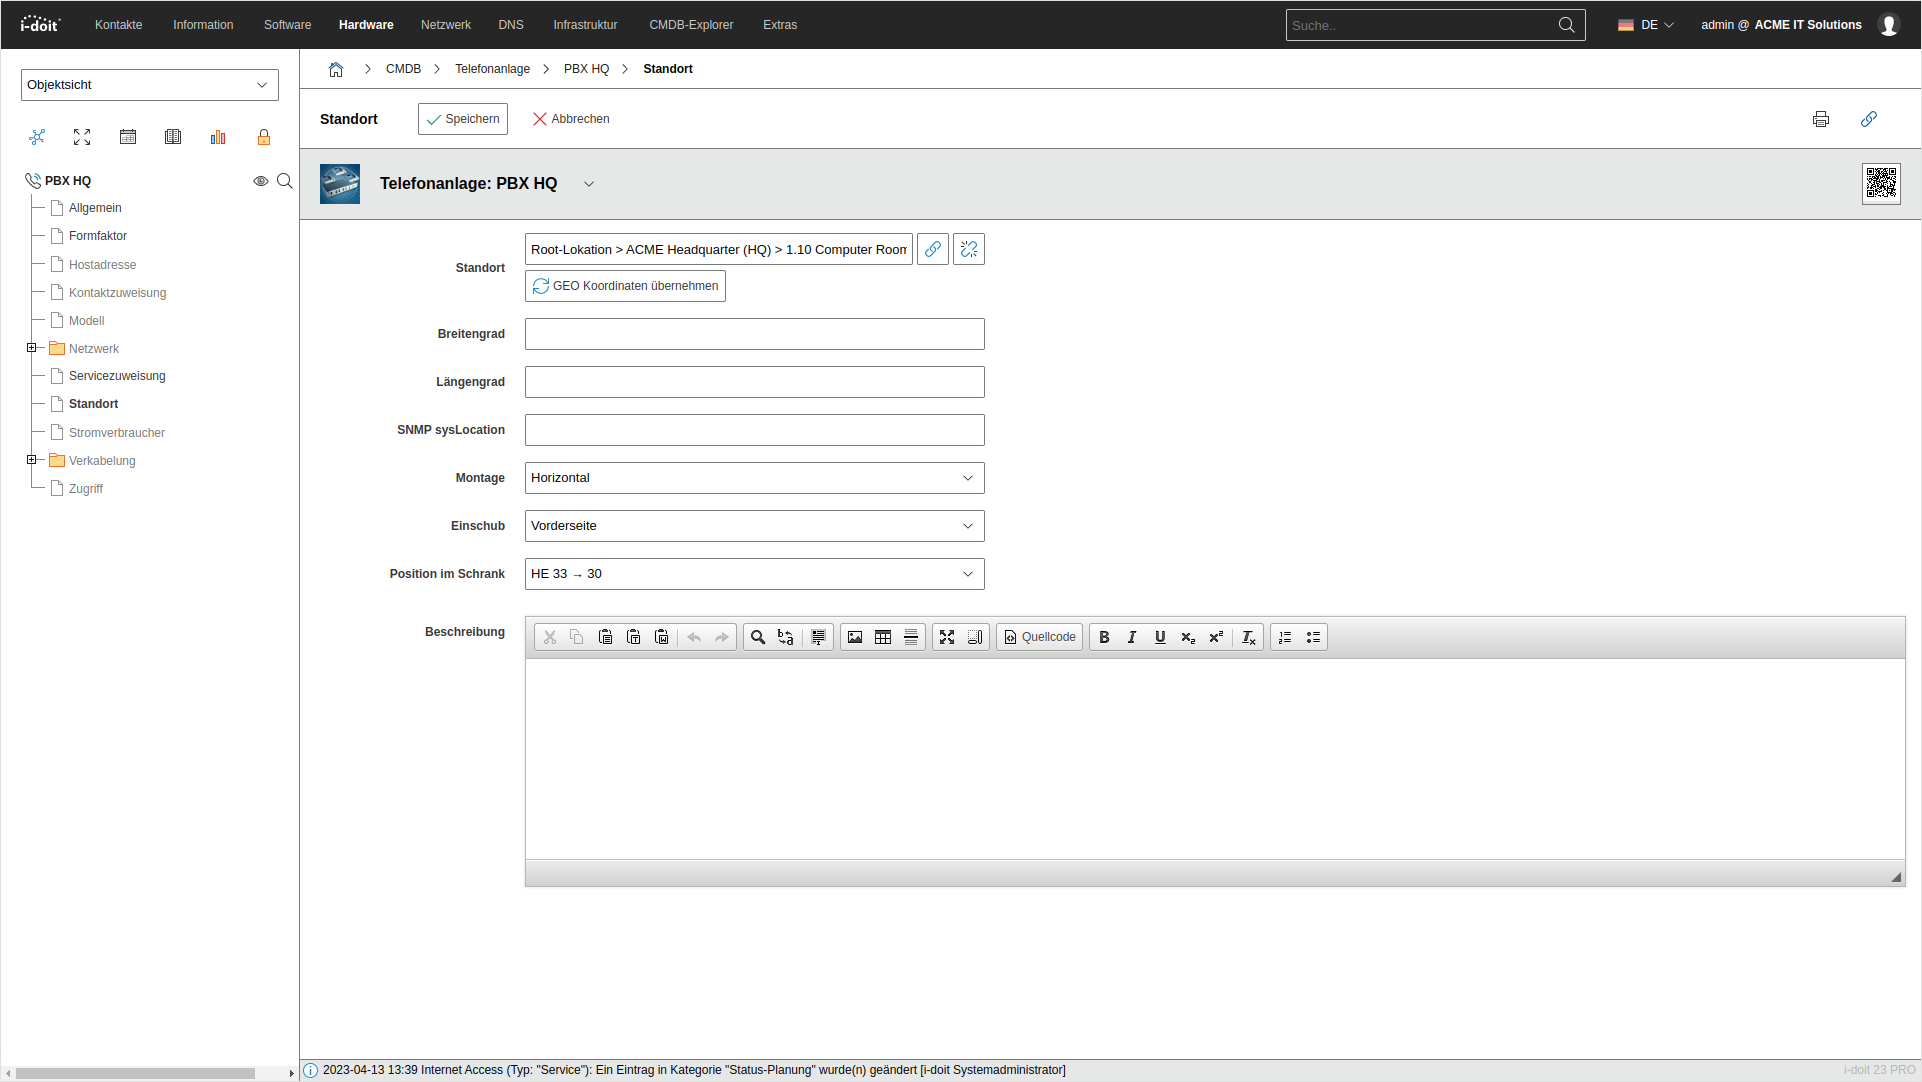
The assignment of object to rack takes place in the Location category, where physical locations are put into relationship with each other. First, the rack is selected in the Location attribute. Then additional attributes appear that need to be filled in:
-
Assembly:
Is the object installed horizontally ("normal" installation) or vertically (for example, PDUs on the side)? -
Insertion:
Does the object occupy the full depth of the rack (front and back) or is it only mounted on the front or the back? For one-sided mounted objects, the same rack unit can be double-occupied, i.e., once in front and once in back. -
Position in rack:
For horizontal assembly, the rack units are selected. Depending on how many RUs an object occupies, the entries in the drop-down menu change. For vertical assembly, the slots are listed here (top right = 1, top left = 2, bottom right = 3, bottom left = 4, etc.). Already occupied RUs or slots are hidden.
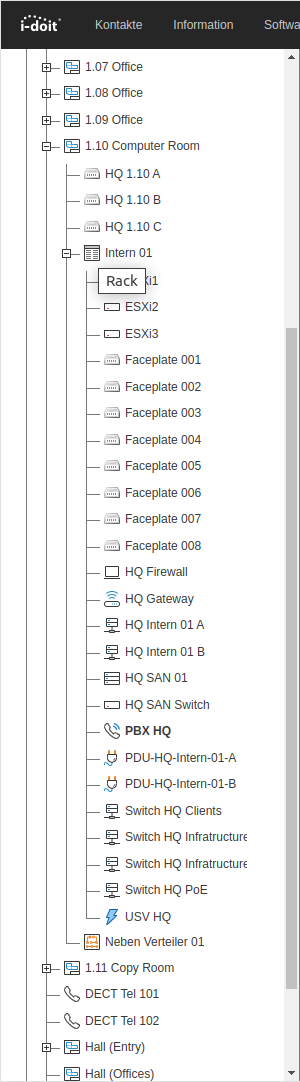
Already assigned objects are displayed in the Location View and in the Locally Assigned Objects category.
Editing Assigned Objects#
In the Rack category, you can edit the assigned objects. Each object has a small button with a downward arrow. Click on it to see the following options:
-
Object link:
The overview page of the object is opened. -
Reassign object:
A dialog opens on the right side where you can reposition an object (see below). -
Detach object:
The information about the object's position in the rack is deleted. The object remains assigned to the rack via the location assignment.
Objects that are spatially assigned to the rack but not yet positioned can be found on the right side in the Unpositioned Objects box. Via the gear button, you change the required RUs of the object. Via the X button, the location assignment is irrevocably deleted (purge).
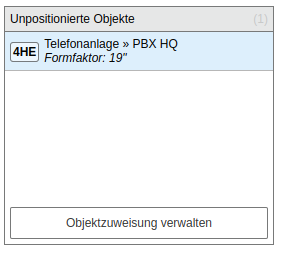
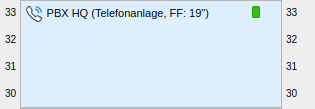
Click on the object in the list to open another box below. Use the dialogs to position the object in the rack.
Statistics#
The Rack category provides a comprehensive evaluation of the assigned objects. Above the visual view of the rack, there is a Statistics box that can be expanded and collapsed by clicking the arrow on the left side.
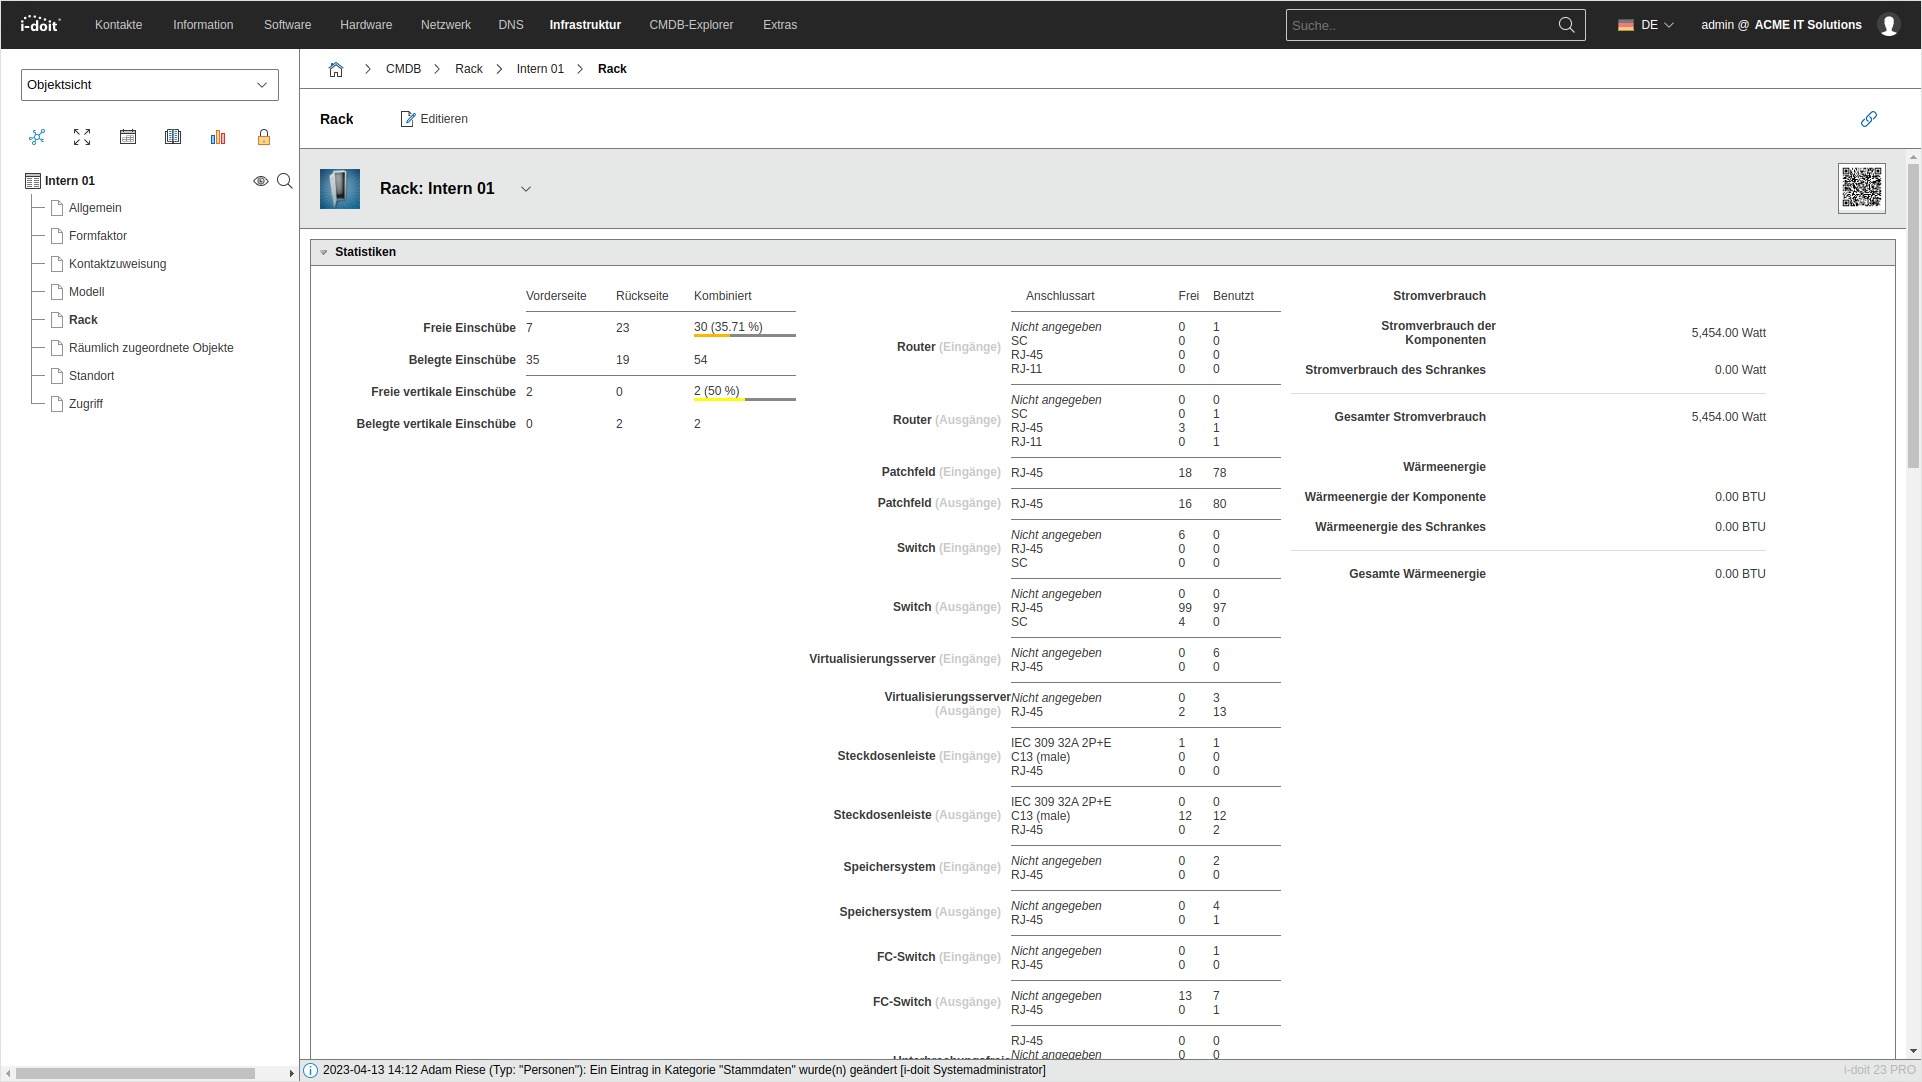
The statistics are composed of various attributes of the rack and assigned objects:
| Statistic | Objects | Categories | Attributes |
|---|---|---|---|
| Free slots | Rack Locally assigned objects | Form Factor Location | Rack units Assembly, Insertion, Position in rack |
| Occupied slots | see above | see above | see above |
| Free vertical slots | see above | see above | see above |
| Occupied vertical slots | see above | see above | see above |
| PDU connectors (input) | Locally assigned objects of type Power distribution unit | Cabling → Connectors | Input/Output, Connector type, Connected with |
| PDU connectors (output) | Locally assigned objects of type Power distribution unit | Cabling → Connectors | Input/Output, Connector type, Connected with |
| Switch ports | Locally assigned objects of type Switch | Network → Port | Connector, Connected with |
| FC switch ports | Locally assigned objects of type FC Switch | Network → Port | Connector, Connected with |
| Patch panel ports (inputs) | Locally assigned objects of type Patch Panel | Cabling → Connectors | Input/Output, Connector type, Connected with |
| Patch panel ports (outputs) | Locally assigned objects of type Patch Panel | Cabling → Connectors | Input/Output, Connector type, Connected with |
| Total power consumption | Locally assigned objects | Power consumer | Watt |
| Total heat energy | Locally assigned objects | Power consumer | BTU |
Racks Category#
If a rack is assigned to a room via the Location category, an additional visualization is available. The Racks category is already assigned to the Room object type in the standard installation of i-doit. Through this, all objects of type Rack assigned to the room are visually displayed.
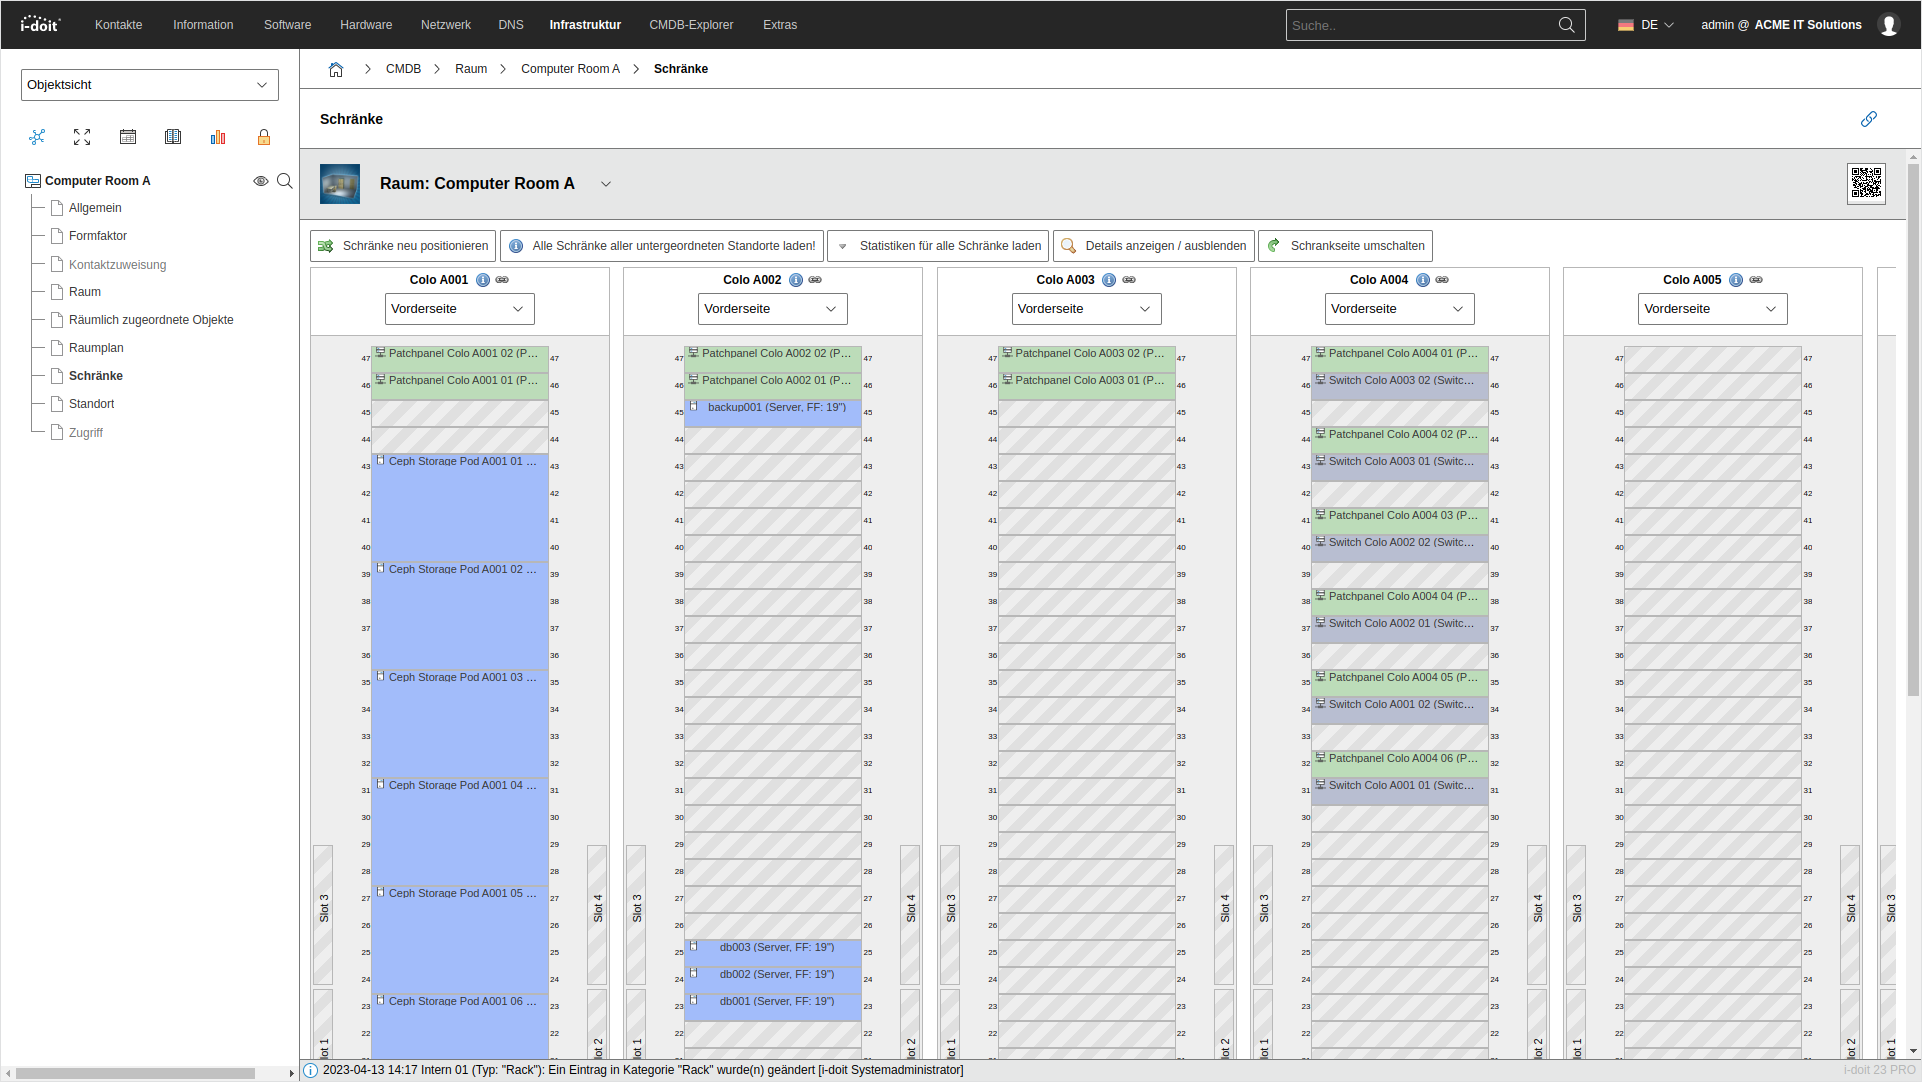
Above the visualization, various options are available.
-
Reposition racks:
The order of the racks can be adjusted here. -
Load all racks from all subordinate locations!
Racks assigned deeper in the location hierarchy are also loaded. By default, directly assigned objects of type Rack are displayed. The Racks category can therefore be assigned, for example, to objects of type Building, which contain rooms and only below them racks. -
Load statistics for all racks:
The statistics (see above) of all racks are displayed one after another.