i-doit 33 Update and Flows Installation
Here we describe how to update i-doit to version 33 to use the Flows Add-on.
1. i-doit 33 Update#
To use the Flows Add-on and all new features, you must first update i-doit to version 33.
Update via the Online Updater#
Version 33 is immediately available via the Online Updater.
If your instance can reach the internet, use the update via the Updater. The prerequisite is being logged in to i-doit with administrator rights.
Step 1: Open the Administration in i-doit 32#

Step 2: Open [tenant-name] Administration#
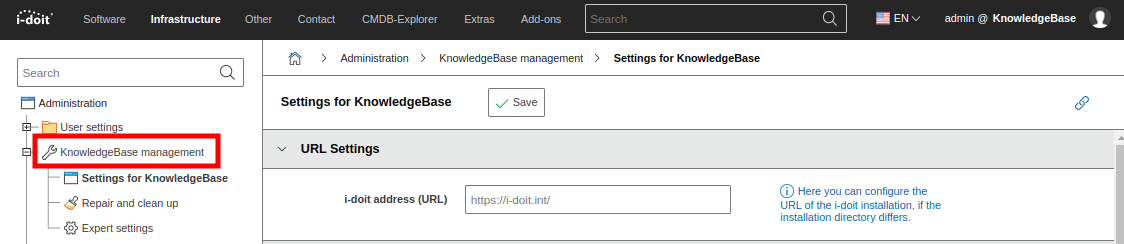
Step 3: Click the i-doit Update button#

Preparing the Offline Update and opening the Updater#
If your instance does not have internet access, you must manually extract the update package into the i-doit root directory.
Step 1: Download i-doit 33 Updater#
Download the update package from the Customer Portal.
Step 2: Move idoit-33-update.zip to the i-doit directory#
You can place the update package on the server (for example via WinSCP). Then move the package into the main directory of i-doit, if you have not already placed it there directly:
1 | |
Step 3: Extract the ZIP file#
Change to the i-doit directory:
1 | |
Extract the ZIP file and allow all files to be overwritten:
1 | |
Now adjust the file permissions so that the web server has read and write access to i-doit.
The user:group combination www-data:www-data used here refers to Debian or Ubuntu Linux. If you are using a different operating system, you must adjust the user:group combination accordingly. See here.
1 2 3 4 | |
1 2 3 4 | |
1 2 3 4 | |
Step 4: Open the Administration in i-doit 32#
Step 5: Open [tenant-name] Administration#
Step 6: Click the i-doit Update button#
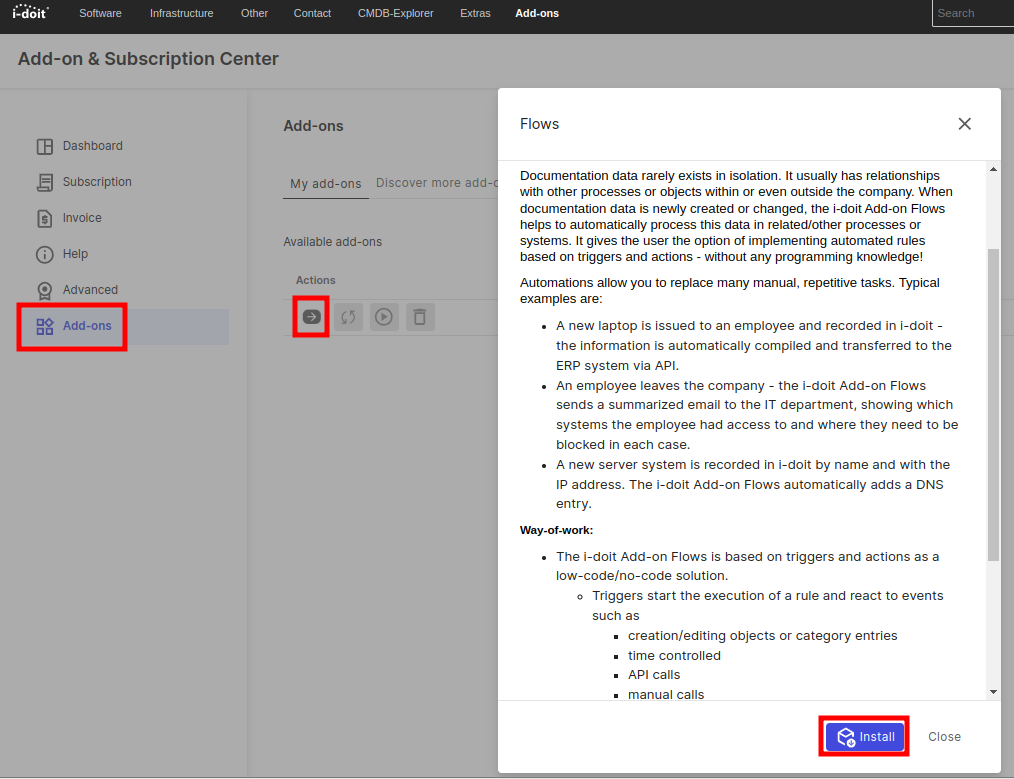
2. Flows Add-on installation#
With i-doit 33, the Subscription & Add-ons feature was added, through which you can install add-ons directly. The Flows Add-on can also be installed as usual via the Admin Center.
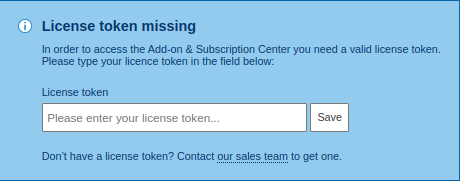
(Online) Flows Add-on via Subscription & Add-ons#
To use the Subscription & Add-ons feature, you need the license token. Enter it here and save it.
Step 1: Open Subscription & Add-ons#

Step 2: Save license token#
Step 3: Open Add-ons and install the Flows Add-on via Actions#
(Offline) Flows Add-on via the Admin Center#
If your i-doit instance cannot access the internet or the Subscription & Add-ons backend, download the add-on from the Customer Portal and install it via the Admin Center.
Step 1: Download the Flows Add-on from the Customer Portal#
First log in to the Customer Portal at https://center.i-doit.com and download the Flows Add-on under Add-ons.
Step 2: Open Admin Center#
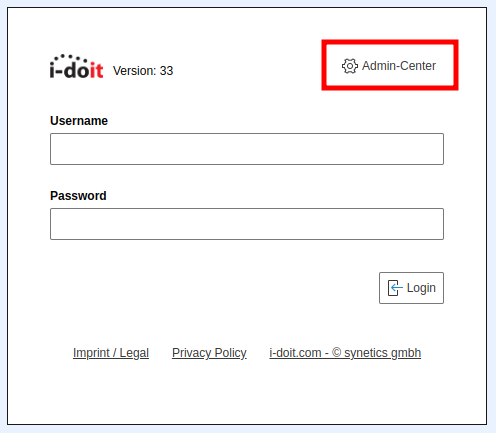
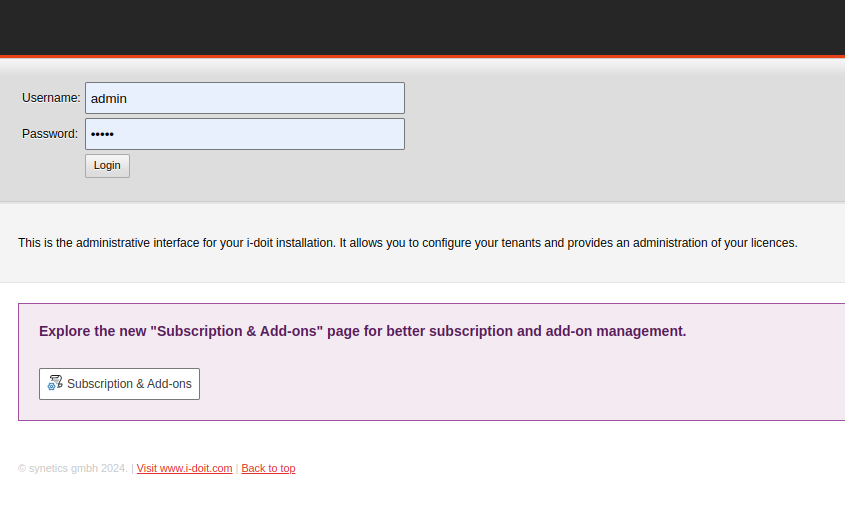
Step 3: Log in to the i-doit Admin Center#
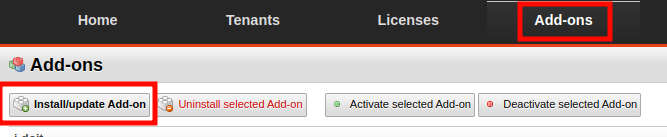
Step 4: Install the Flows Add-on#
Click the heading Add-ons, then click Install/update Add-on and select the Flows ZIP file:
3. Automated Execution of Flows#
The Flows Add-on comes with two CLI commands. Both commands are required for the Flows Add-on to function.
The Flows Add-on comes with two CLI commands. Both commands are required for the Flows Add-on to function fully. There are two options for setting up the CLI commands. The commands can be executed, for example, via a crontab. We have also created a service installation script named create-daemon.sh that is located in the Flows Add-on directory under i-doit/src/classes/modules/synetics_flows/.
Using the system service installation script#
First set the execution rights for the file. Use the following command in the i-doit directory:
1 | |
Now you can execute create-daemon.sh to create and enable a service for the automatic execution of Flows. Each tenant requires its own service.
-iTenant ID (viewable via the console command tenant-list)-ui-doit admin user in the selected tenant-ppassword of the admin user in the selected tenant
1 | |
Creating a crontab#
Create a crontab for the Apache user. Example for Debian:
1 | |
Add the following lines at the end of the file after replacing the i-doit login credentials. You may also need to adjust the tenant ID.
1 2 | |
If you have questions or need additional support, please contact us at help@i-doit.com.