i-doit pro Add-ons#
The IT documentation and the CMDB are in the foreground of i-doit. Moreover, there are extra add-ons to expand the scope of available functions of i-doit in line with your demands. In this way, the user is provided with a completely new perspective on IT documentation.
"Modules" and "Extensions"
The previously called "Modules" and "Extensions" were renamed "Add-ons" in March 2017. However, in some places in the software you can still find the old names which will replaced gradually with new releases.
List of Available Add-ons#
| Add-on | Available for i-doit pro? | Available for i-doit open? | Subject to license? |
|---|---|---|---|
| Add-on Packager | yes | no | no |
| Active Directory Documentation (GER) | yes | no | no |
| Analysis | yes | no | yes |
| API | yes | yes | no |
| Cabling | yes | no | no |
| Checkmk | yes | no | no |
| Checkmk2 | yes | no | yes |
| DNS Documentation (GER) | yes | no | nein |
| Documents | yes | no | yes |
| Events | yes | no | no |
| Floorplan | yes | no | no |
| HomeOffice (GER) | yes | no | no |
| i-diary | yes | no | no |
| ISMS | yes | no | yes |
| Maintenance | yes | no | no |
| Nagios | yes | no | no |
| Relocate-CI | yes | no | no |
| Replacement | yes | no | no |
| Report Special (GER) | yes | no | no |
| VIVA (GER) | yes | no | yes |
| Workflow | yes | no | no |
Beside these add-ons there are many others which are provided by our partners or external developers. You can find a detailed list at the i-doit website i-doit.com under Product → Add-ons.
Download#
Add-ons are available as ZIP-files. These are installed via the Admin Center.
Customers can download add-ons in the customer portal. Add-ons which are subject to licensing (see above) will be unlocked for download in your customer account in the buying process.
If you miss any add-ons that you bought, please contact help@i-doit.com for assistance.
Evaluation users can download all free- und commercial add-ons in the evaluation process. There are download buttons for all add-ons on your personal evaluation page (e.g. https://portal.i-doit.com). All add-ons that are subject to licensing are licensed in the evaluation license.
Installation#
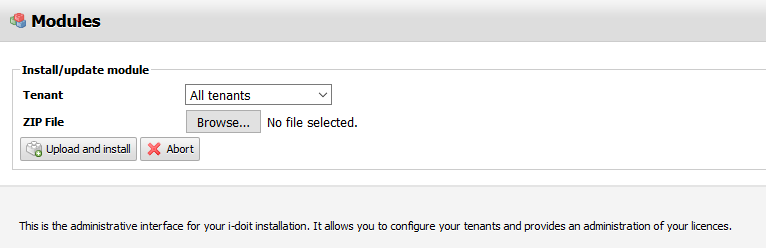
All add-ons are installed via the admin center. After successfully logging in to the admin center, just change to the Modules tab and use the Install/update module button.

As soon as you click the button a new dialogue appears. First you have to determine whether the add-on is to be installed for all tenants (All tenants) or just for a single one. Click the Browse... button under ZIP File to select the add-on. To confirm the download and installation of the ZIP file to the host click Upload and install.
System settings
The settings for the file upload need to allow the upload to make the installation possible. The limit for the maximum file size also needs to be above the file size of the archive for the installation.
After the add-on has been installed successfully, you will receive a confirmation message. The add-on will now also appear in the list of installed add-ons of the corresponding tenant. Each tenant uses a separate list.

If an add-on is available but not yet installed, it will be marked with not installed in the list of the respective tenant. With the Install button you can carry out the installation later without having to upload the ZIP file again.
Rights Assignment#
Each add-on has its own rights which are assigned per person or person group. After installation of a new add-on, the users have no permissions yet to use it. You have to carry out further steps in the Rights Management.
Update#
Once a new version of an add-on is available you can perform an update without the need to completely install it again. All existing data persist during this process.
The required steps are similar to the installation process: Upload and install the new ZIP file via the Install/update module button. Alternatively, for some add-ons the Update / Re-Install button in the respective list can be clicked to perform the update process if the system has a internet connection. The ZIP file will be uploaded and installed automatically. Please note that this function is not available for all add-ons.
Uninstall#
You can uninstall an add-on with the above mentioned list by activating the checkbox and then using the Uninstall selected module button. A dialogue will ask you to confirm this action. All files and user data associated with the add-on will be deleted irreversibly. The uninstallation will be tenant-wide. By clicking various checkboxes you can uninstall several add-ons simultaneously.
(De)activation#
If you wish to pause the usage of an add-on without deleting the associated data, you can deactivate the add-on. To do so activate the checkbox of the corresponding entry in the list and use the Deactivate selected module button for the respective tenant. Now the functions and user data of the add-on are no longer available.
A renewed activation follows a similar process: Select the respective add-on in the list and click the Activate selected module button. Now the functions and user data will be available again.
All other tenants remain unaffected by these actions. By clicking various checkboxes you can activate/ deactivate several add-ons respectively one add-on for several tenants simultaneously.