Microsoft Windows Server#
This article describes how to install i-doit on the Windows operating system. The i-doit installation package for Windows is provided in the customer portal.
The contents of the package are as follows:
- i-doit Windows Installer.exe
- idoit-XX.zip
- src.zip
- windowsdesktop-runtime-6.0.14-win-x64.exe
The installation package always includes the current i-doit version. The src.zip folder also enables installation without an internet connection. Since the i-doit Windows installer requires windowsdesktop-runtime-6.0.14, it is also provided in case no internet connection is available during installation.
installation#
After running the i-doit Windows Installer.exe, the following GUI is displayed:
After clicking Install, all required components are installed in the background.
The following are installed:
- Apache 2.4
- PHP 8.2
- MariaDB 10.6
- i-doit
If the Windows Firewall is enabled, you will be asked whether to allow the application
On successful installation, a small window displays "i-doit has been installed successfully.". After clicking OK, a new browser tab with the localhost URL opens automatically and you can use i-doit to its full extent.
If an error occurs during installation, a log file is automatically created in the i-doit folder
Configuration#
The storage location of the PHP, MariaDB, or Apache configuration:
-
PHP:
C:\ProgramData\i-doit\php\php.ini -
MariaDB:
C:\ProgramData\MariaDB\data\my.ini -
Apache:
C:\ProgramData\i-doit\apache-2.4\conf\httpd.conf
Credentials#
Here you can find the login data for the i-doit Windows Installer:
| Platform | Username | Password |
|---|---|---|
| MariaDB root | root | idoit |
| MariaDB i-doit | idoit | idoit |
| i-doit Admin-Center | admin | admin |
| installation directory | C:\ProgramData\i-doit | - |
The i-doit login credentials can be found here.
Set Up HTTPS (Optional)#
The following guide shows how to set up SSL for Windows with i-doit. Only the necessary steps to configure HTTPS are described. This section can be skipped.
Prerequisites#
You first need a valid certificate in .crt and .key format. You can create this with OpenSSL. You can download and install OpenSSL, for example, here: OpenSSL. Once OpenSSL is installed, you can open the Win64 OpenSSL Command Prompt via the Windows search bar by searching for "OpenSSL". Enter the following command to create the certificate:
1 | |
The certificate and private key have now been created in the folder where the command was executed. Copy them, for example, to the folder ProgramData\i-doit\apache-2.4\conf\extra\.
Configuration Steps#
1. Create the ssl.conf File#
Navigate to your i-doit folder at ProgramData\i-doit\apache-2.4\conf\extra\ and create the file ssl.conf. The file should have the following content:
1 2 3 4 5 6 7 8 9 10 11 12 13 14 15 16 17 18 19 20 21 22 23 24 25 26 27 | |
Note: Adjust the paths and configuration settings according to your own environment and make sure your certificate and private key are present in the specified paths.
2. Modifications in httpd.conf#
Edit the httpd.conf file located at i-doit\apache-2.4\conf\
- Add
Listen 443and comment outListen 80. This will make i-doit no longer accessible via HTTP. - Also add the following lines:
LoadModule ssl_module modules/mod_ssl.soandInclude conf/extra/ssl.conf
The file should then look like this if nothing was changed before:
1 2 3 4 5 6 7 8 9 10 11 12 13 14 15 16 17 18 19 20 21 22 23 24 25 26 27 28 29 30 31 32 33 34 35 36 37 38 39 40 41 42 43 44 45 46 47 48 49 50 51 52 53 54 55 56 57 58 59 60 61 62 63 64 65 66 67 68 69 70 71 72 73 74 75 76 77 78 79 80 81 82 83 84 85 86 87 88 89 90 91 92 93 94 95 96 97 98 99 100 101 102 103 104 105 106 107 108 | |
3. Restart Apache Web Server#
- Press Win+R, type
cmd, and press Enter. - Or type
cmdin the Windows search bar to open the command prompt
Enter the following command to restart the Apache web server:
1 | |
The Apache web server has now been restarted. Check the installation and whether i-doit is accessible via HTTPS.
That's it! Your i-doit installation is now configured for SSL on Windows.
Uninstallation#
To uninstall i-doit, the Apache2 service must first be stopped. Enter the following command in the command prompt:
1 | |
Once the Apache2 service is stopped, Apache2 can be uninstalled:
1 | |
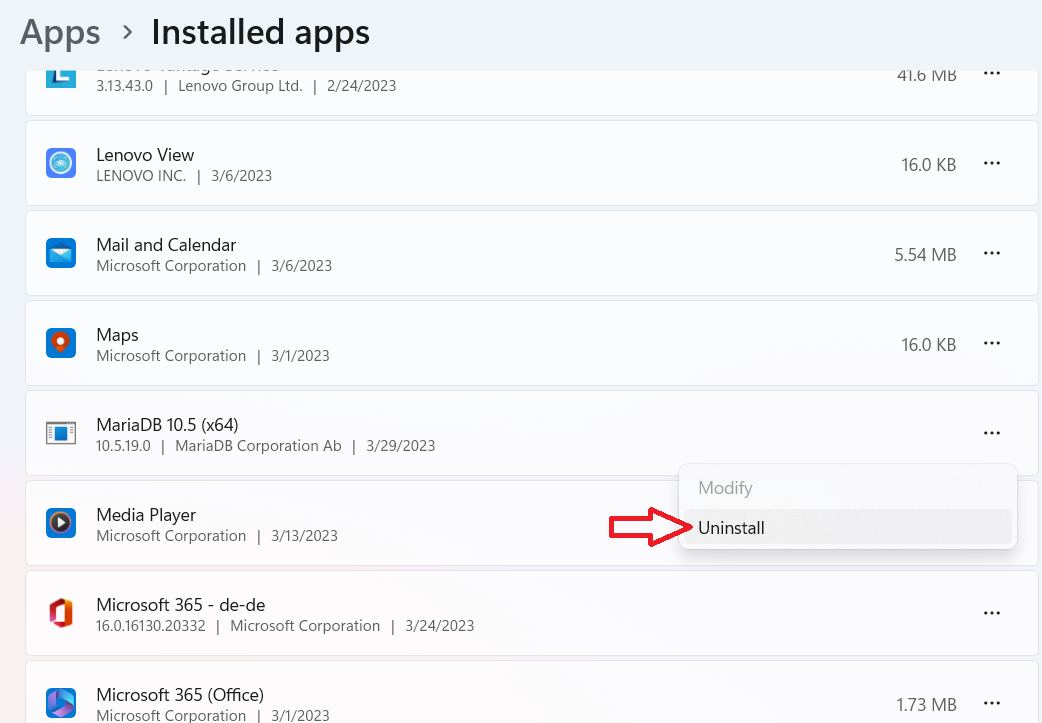
Then uninstall MariaDB by removing it under Add or remove programs.
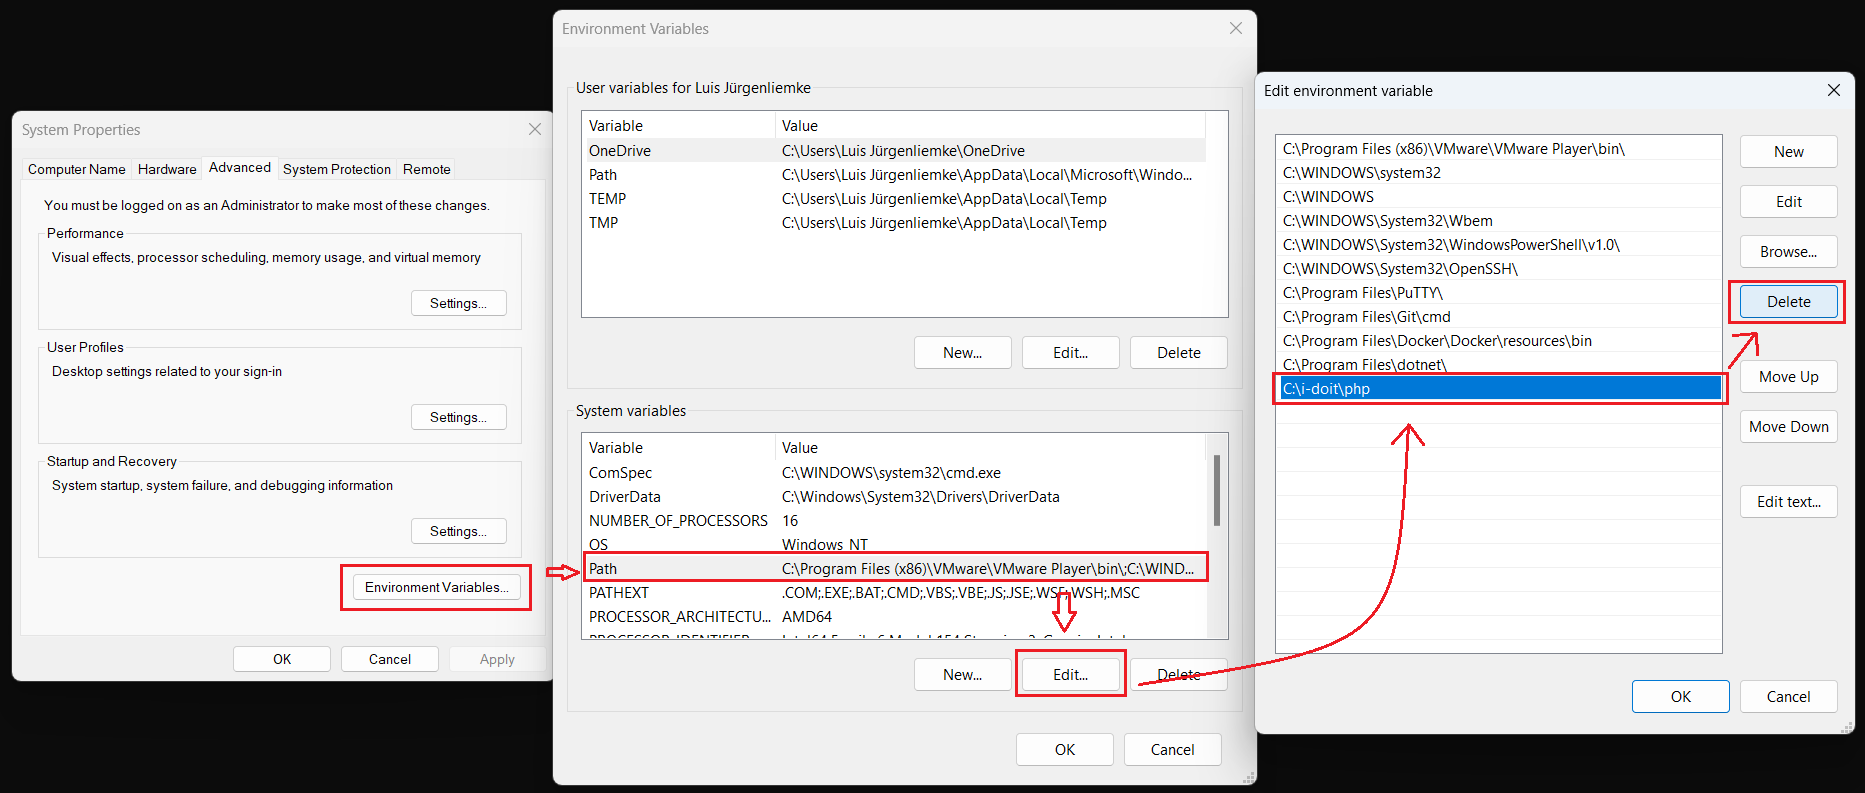
Now the i-doit folder must be deleted and the PHP PATH must be removed from the environment variables:

Install i-doit Discovery for Windows Server#
This section describes how to install i-doit Discovery. The i-doit Discovery package can be found on our website.
The contents of the package are as follows:
- i-doit Discovery Installer.exe
- idoit-XX.zip
- src.zip
- windowsdesktop-runtime-6.0.14-win-x64.exe
The installation package always contains the latest i-doit version as well as JDisc 5.0 and several JDisc add-ons. The src.zip folder also enables installation without an internet connection. Since the i-doit Windows installer requires windowsdesktop-runtime-6.0.14, it is also included in case no internet connection is available.
installation#
After running the i-doit Discovery Installer.exe, you will see the following GUI:

After clicking Install, all required components are installed in the background.
The following components are installed:
- Apache 2.4
- PHP 8.2
- MariaDB 10.6
- i-doit
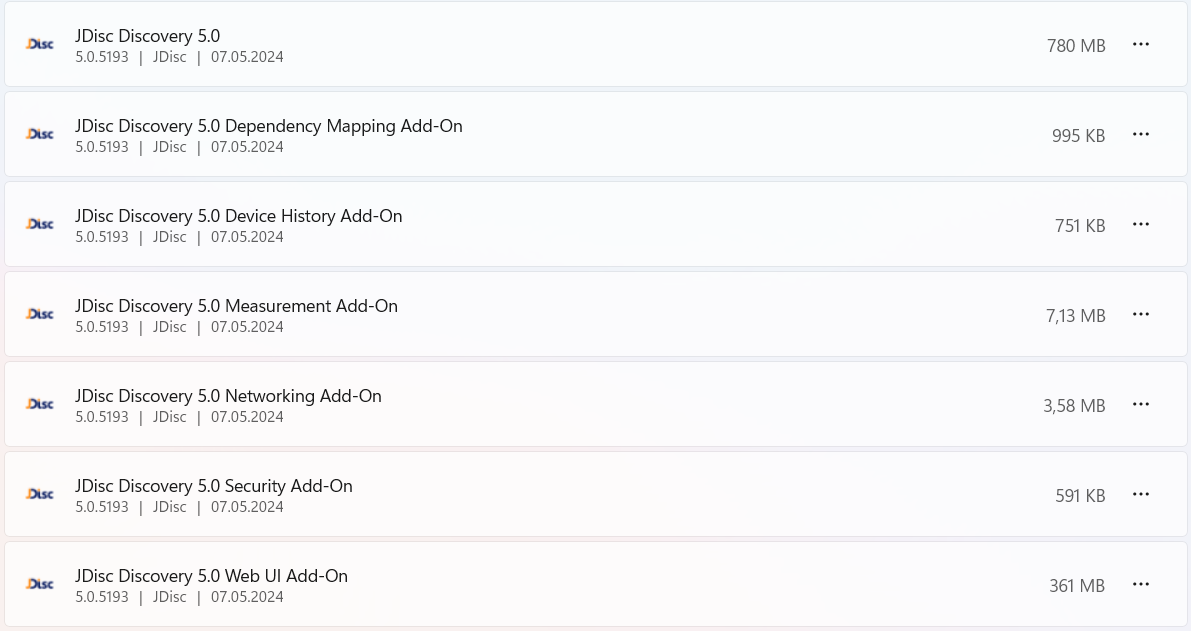
- JDisc 5.X
- JDisc JDisc Discovery Dependency Mapping 5.X(Add-on)
- JDisc Discovery Device History 5.X(Add-on)
- JDisc Discovery Measurement 5.X(Add-on)
- JDisc Discovery Security 5.X(Add-on)
- JDisc Discovery WEB UI 5.X(Add-on)
If the firewall is enabled, you will be asked whether you trust the software
After the installation is successful, a small window appears with the following message: "i-doit Discovery has been successfully installed.". After clicking OK, a new window opens in your browser where the localhost URL is automatically opened. You can now use i-doit Discovery to its full extent.
If an error occurs during installation, a log file is created in the i-doit Discovery folder.
Configuration#
The configuration files for PHP, MariaDB, or Apache can be found in the following directories:
-
PHP:
C:\ProgramData\i-doit-discovery\php\php.ini -
MariaDB:
C:\ProgramData\MariaDB\data\my.ini -
Apache:
C:\ProgramData\i-doit-discovery\apache-2.4\conf\httpd.conf
Credentials#
Here you can find the login data for the i-doit Windows Installer:
| Platform | Username | Password |
|---|---|---|
| MariaDB root | root | idoit |
| MariaDB i-doit | idoit | idoit |
| i-doit Admin-Center | admin | admin |
| JDisc Database | postgres | idoitdiscovery |
| JDisc Database (ReadOnly) | postgresro | idoit |
| installation directory | C:\ProgramData\i-doit-discovery | - |
The i-doit login credentials can be found here.
Uninstallation#
To uninstall i-doit, the Apache2 service must first be stopped. Enter the following command in the command prompt:
1 | |
Once the Apache2 service is stopped, Apache2 can be uninstalled:
1 | |
Then uninstall MariaDB by removing it under Add or remove programs.
Additionally, JDisc and its add-ons must be removed under Add or remove programs.
The JDisc add-ons must be uninstalled before JDisc!
Now the i-doit folder must be deleted and the PHP PATH must be removed from the environment variables:
FAQ#
Improved Website Loading#
On Windows, i-doit takes longer to load in the browser. This is usually due to the antivirus scanner configuration under Windows. You should create an exception for the following i-doit directories: